UV DTF transfer combines the vibrancy of UV-curable inks with the flexibility of direct-to-film processes, delivering bold, durable designs that cling to a wide range of fabrics. This approach is favored by designers and small brands seeking sharp detail, bright color, and a relatively streamlined workflow, whether you’re exploring a transfer guide or starting with custom apparel transfers. With proper curing and heat-press steps, you can apply the design to both light and dark garments, broadening your options for DTF transfer on fabric. The method supports quick production cycles and durable results, aligning well with on-demand printing and UV printing on apparel, making it a fit for designers and small businesses. To get the best outcomes, learn how to apply UV DTF transfer correctly, prep the fabric, and follow care guidelines that preserve color and adhesion.
Similarly, the UV-curable film transfer approach—sometimes described as a UV-ink transfer or digital-to-fabric print—offers designers a modern way to decorate apparel. By using UV-curable inks printed on a special film, the result remains vivid on a range of cloth types, including dark fabrics, while the setup scales from single-item orders to small runs. Key steps include surface prep, heat-press settings, and post-press curing, all of which align with efficient workflows described in UV transfer guides and related tutorials. If you’re building a brand around custom apparel, this family of techniques complements screen printing and direct inkjet methods by offering high fidelity imagery with durable finish.
Understanding UV DTF transfer: benefits and applications for custom apparel
UV DTF transfer blends UV-curable inks with a Direct-to-Film workflow to deliver vibrant, durable designs on a broad range of fabrics. The process begins with printing a design onto a DTF transfer film using UV inks, followed by heat and pressure to embed the image into the garment. This approach yields bright colors, fine detail, and a flexible transfer that remains comfortable to wear.
Because it uses UV-curable inks, curing happens quickly, reducing production time and enabling efficient custom apparel transfers in small batches. The film-based medium supports a wide fabric compatibility—from cotton and blends to performance fabrics—making UV DTF transfer a versatile option for brands and solo designers alike.
UV DTF transfer guide: from design to finished print
To follow the UV DTF transfer guide, start with a high-resolution design—ideally vector or high-density raster—and plan for mirroring if your printer requires it. Choosing the right transfer film and adhesive setup establishes clean edges, accurate color, and a reliable bond to the fabric.
Pre-press preparation includes pre-washing garments, removing sizing or finishes that could hinder adhesion, and ensuring a flat surface for precise alignment. A test garment helps verify positioning and color depth before committing to production, reducing the risk of costly mistakes.
DTF transfer on fabric: prep, adhesion, and fabric compatibility
DTF transfer on fabric requires thoughtful preparation and compatible substrates. Begin by washing and drying fabrics to remove finishes that could impede adhesion, then smooth the surface to prevent ghosting or edge wear during transfer.
Adhesive choice and powder application, followed by a controlled curing step, are essential to durable results. Testing on fabric swatches helps confirm adhesion strength and tolerance for fabric stretch, ensuring the final image remains intact through wear and washing.
UV printing on apparel: colors, underbases, and durability
UV printing on apparel delivers bright, high-resolution color on both light and dark garments. A common strategy for dark fabrics is applying a white underbase to preserve color vibrancy and detail, so imagery reads consistently across fabric types.
Durability depends on proper curing and care. After heat pressing, allow sufficient cooldown and follow recommended post-press care to maintain color fidelity, including washing guidelines and avoiding high-heat drying that can accelerate wear on the print.
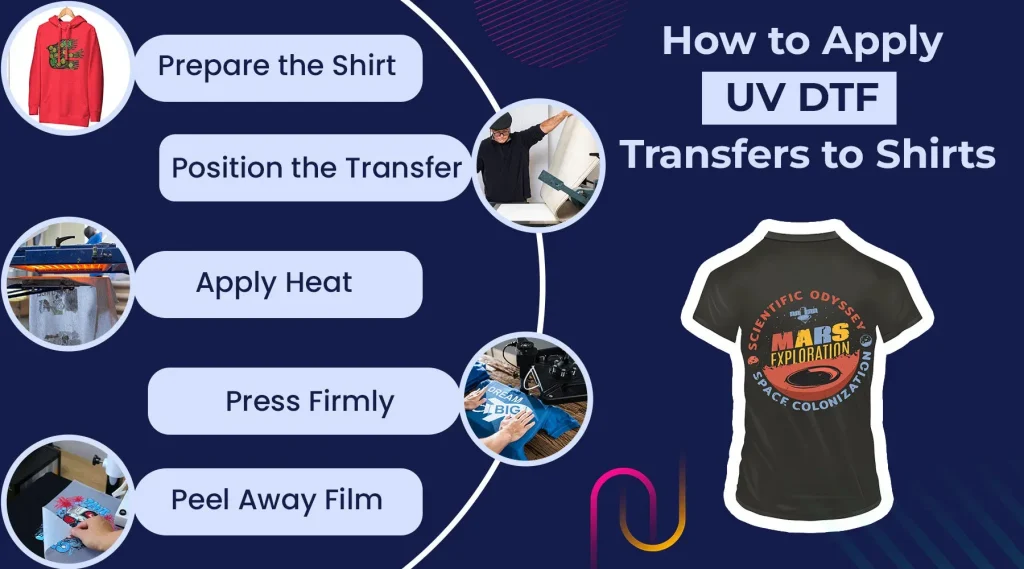
How to apply UV DTF transfer: a practical step-by-step guide
How to apply UV DTF transfer is a practical, repeatable process: print the design on UV film, apply any necessary powder, cure per manufacturer guidance, then let the film cool before handling. This sequence helps prevent smudging and ensures consistent color saturation.
For the actual transfer, position the garment on a flat platen, cover with a protective sheet, and apply the recommended temperature, time, and pressure. Decide whether to peel the film hot or cold based on your product guidelines, and plan a possible post-press cure to maximize durability.
Custom apparel transfers: scaling production and business considerations
Custom apparel transfers scale well for small businesses when workflows are standardized. Create swatches, obtain client approvals, and maintain a library of settings for each fabric type to ensure consistent results across orders.
Consider safety, sustainability, and cost control as part of your brand strategy. Document material costs, lead times, and packaging practices to support reliable turnaround and communicate value to clients seeking custom apparel transfers.
Frequently Asked Questions
What is UV DTF transfer and how does it work?
UV DTF transfer combines UV-curable inks printed on a DTF transfer film with heat and pressure to embed a design into fabric. The inks cure instantly under UV light, delivering bright, detailed images ideal for UV printing on apparel. The flexible film and adhesive create durable transfers on a wide range of fabrics.
How to apply UV DTF transfer to fabric?
Prepare the garment by pre-washing and smoothing the surface. Print your design on the UV DTF transfer film, applying any required powder or adhesive as directed by your supplier. Cure the film if required, then position the transfer on the fabric, cover with protective sheet, and apply heat and pressure per the product guidelines. Finally, peel and allow any post-press curing if recommended.
Which fabrics are best for UV DTF transfer (DTF transfer on fabric)?
UV DTF transfer works well on many fabrics, including cotton, cotton blends, and select synthetics. For dark fabrics, use a suitable white underbase to ensure vibrant color. Always test on fabric swatches to optimize adhesion and color on your chosen textile.
How durable is a UV DTF transfer and how should I care for it (UV printing on apparel)?
Durability depends on proper curing and care. Ensure full cure and avoid exposing prints to high heat during washing. Turn garments inside out, wash in cold or warm water with mild detergent, and air dry or tumble on low heat to preserve vibrancy in UV printing on apparel.
What are common issues with UV DTF transfer and how can I troubleshoot (custom apparel transfers)?
Common issues include faint colors, cracking, peeling, color shift on dark fabrics, and smudging. Troubleshoot by verifying ink flow and film compatibility, checking underbase on dark fabrics, confirming correct heat/time/pressure, ensuring proper curing, and keeping the work surface clean to prevent contamination.
What are best practices for consistent results with UV DTF transfer for custom apparel transfers?
Follow manufacturer guidelines for inks, films, and adhesives. Run test prints on swatches before full runs, document temperature, time, and pressure settings, and maintain a clean, dust-free workspace. Build a library of proven settings for different fabric types to ensure reliable, repeatable results for custom apparel transfers.
| Aspect | Key Points | Notes/Details |
|---|---|---|
| What is UV DTF transfer | A dye-sub–like transfer using UV-curable inks printed on a DTF transfer film; cured instantly under UV light; heat and pressure embed the design into fabric; film provides a flexible, durable medium. | Durable, color-rich image across a wide range of fabrics. |
| Why choose UV DTF transfer | Bright, high-resolution colors and fine details; prints on many fabrics (woven and knit), including dark and light garments; straightforward workflow; durable with proper curing and care; scalable for small-batch or single designs. | Ideal for designers and small businesses seeking vibrant results with flexibility in fabric choice and production scale. |
| Essential tools and materials | UV DTF printer or compatible setup; DTF transfer film and adhesive; white underbase and UV inks (or full UV color set); clear protective laminates if recommended; heat press or clamp press with even platen temperature; teflon sheet or silicone pad; lint-free wipes and isopropyl alcohol; fabric powder or release agent if required; printable garment substrates. | Check supplier compatibility and recommended workflow for your setup. |
| Design and preparation | Create high-resolution design (vector or high-density raster); account for mirroring; pre-wash and dry garment; iron out wrinkles; plan placement with curved ruler or tape; use a test garment or sample swatch to verify alignment. | Test garment helps verify alignment before a real order. |
| Printing and curing the UV DTF transfer | Print onto the DTF transfer film with UV-curable inks; apply powder adhesive if required; cure the film’s surface per manufacturer guidelines; allow the film to cool before handling. | Follow manufacturer guidelines for ink, film, and curing steps. |
| Transferring to fabric | Place garment under the heat press and preheat if recommended; position the transfer on the garment with a protective cover sheet; apply heat and pressure per product specs; peel hot or cold as directed; post-press curing if required. | Even contact and adherence depend on correct temperature, time, and pressure; follow supplier guidance. |
| Post-transfer care and durability | Allow the print to cure fully before washing; turn garments inside out; use a mild detergent; avoid high-heat drying; store away from direct sunlight. | Proper care preserves vibrancy and longevity of the transfer. |
| Common issues and troubleshooting | Faint colors or incomplete coverage: verify ink flow, film compatibility, and alignment; cracking or peeling: ensure proper heat, pressure, and curing; color shift on dark fabrics: use an appropriate white under base; smudging or ghosting: keep surfaces clean and avoid touching printed surface before cure. | Adjust workflow and settings based on observed issues; test as needed. |
| Best practices for consistent results | Follow manufacturer guidelines; perform test prints and heat presses on sample fabrics; keep workspace clean and dust-free; document temperature, time, and pressure settings for each fabric type. | Documentation aids reproducing successful results. |
| Careers and business considerations | Standardize workflows, materials, and quality checks; offer swatches or sample runs for client approval; consider environmental impact and material safety as part of brand narrative; choose low-toxicity inks and responsible disposal practices when possible. | Focus on scalable, sustainable production and client communication. |
Summary
UV DTF transfer is a versatile method for decorating fabric, blending the flexibility of DTF film with UV-curable inks to deliver vibrant, durable designs across a wide range of fabrics. This complete guide explains the process—from design and printing to transfer and care—along with practical tools, common challenges, and best practices to help you achieve professional results. With careful preparation, adherence to material guidelines, and ongoing testing, UV DTF transfer becomes a scalable solution for producing compelling, durable custom apparel that meets client expectations and withstands daily wear.