DIY UV DTF Transfer offers a flexible, high-quality method for personalizing apparel and accessories with vibrant, durable designs that resist cracking and peeling through multiple wash cycles. If you’re exploring DIY UV DTF transfer projects, you’ll find it sits between sublimation and traditional heat transfer vinyl, delivering a soft hand, radiant color reproduction, strong wash durability, and the versatility to work on a wide range of fabrics and garment silhouettes. This guide covers materials, process steps, and design considerations, with practical notes on heat press settings for DTF and how to position artwork for shirts and other fabrics, including tips on color management, bleed control, and edge handling. Learn how DTF transfer on shirts and DTF transfer on hats respond to different fabrics, backing types, and platen shapes, and how curved-cap presses and cap-specific settings help maintain alignment, avoid scorching, and preserve detail on curved surfaces. Finally, by selecting reliable DTF film and powder supplies and mastering curing, trimming, and finishing, you’ll achieve durable, soft prints suitable for personal use or a growing business, with clear care instructions to extend garment life.
From a different angle, this is a film-to-fabric printing approach that relies on an adhesive powder and heat to secure a full-color image onto clothes. This alternative framing emphasizes the same outcome—durable, soft-hand graphics—without naming the technique repeatedly, using terms like direct-to-film printing and powder-assisted transfers. LSI principles suggest pairing phrases such as fabric decoration with color-rich decals, screen-free production, and multi-fabric compatibility to broaden the topic’s relevance. With the right materials and a steady workflow, hobbyists and small shops can reproduce professional results on T-shirts, hats, hoodies, and bags.
DIY UV DTF Transfer: What It Is and Why It Works
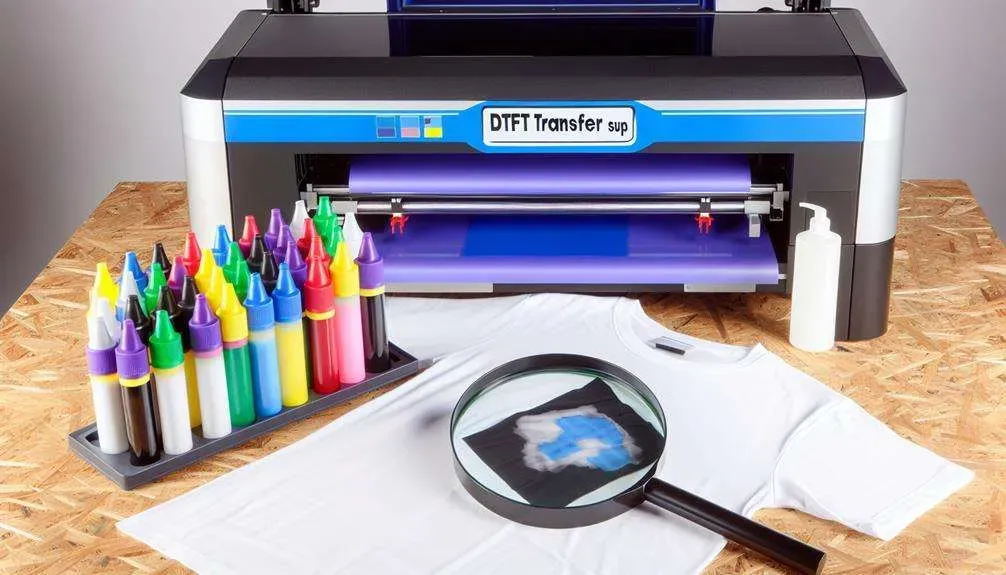
DIY UV DTF Transfer represents a film-based transfer process that moves vibrant full-color designs onto fabrics. The approach sits between sublimation and traditional heat transfer vinyl, delivering a soft hand and durable color that remains flexible even after multiple washes. By using a UV-capable printer to lay down the image on special transfer film, then applying an adhesive powder and heat, you can produce high-quality results at home or in a small shop. This method is central to DIY UV DTF transfer projects, offering creative control and scalable production.
Because it uses a contained film and powder system, you can apply it to a wide range of fabrics—from cotton to poly blends and some synthetics—while maintaining color fidelity and a comfortable feel. The color accuracy and wash durability make it a strong option for bold designs on T-shirts, hoodies, and hats, and the soft hand rivals much of commercial output.
DTF Film and Powder Supplies: Choosing Quality Materials
Selecting materials matters for achieving crisp, durable results. When evaluating DTF film and powder supplies, look for uniform film thickness, even adhesive behavior, and powder that flows evenly to avoid clumps and white edges. Quality components also help minimize issues like powder shedding and halo effects during curing and transfer.
Investing in reliable film and powder directly influences wash durability, edge definition, and overall softness of the finished print. Always store supplies properly, follow manufacturer guidelines for curing, and use protective sheets to prevent ghosting. A thoughtful choice of materials lays the foundation for consistent, professional results across DIY projects.
Design and Artwork for DTF: From Ideas to Printable Files
Great designs start with high-resolution artwork (at least 300 dpi at the intended print size) and, for scalable logos, vector files are ideal. Plan color separations carefully to account for the white underbase on dark fabrics, which helps preserve brightness and color fidelity when using DTF transfer on shirts or other garments. This stage sets up clean color reproduction on the transfer film and reduces the need for last-minute edits.
Consider bold, high-contrast imagery to maintain legibility after transfer, and be mindful of fine details that may blur when scaled. Prepare color separations in layers, and anticipate the print area to avoid distortion on sleeves or curved surfaces. For hats and caps, adjust artwork to accommodate curvature and ensure smooth application during the transfer process.
Heat Press Settings for DTF: Temperature, Time, and Pressure
Heat press settings for DTF are a critical factor in achieving durable, vibrant results. A common starting point is 160°C to 170°C (320°F to 338°F) for about 15 to 20 seconds, using medium pressure. The appropriate peel method—hot, warm, or cold—depends on the film and powder combination and the fabric color, particularly when working with darker garments.
Always refer to the specific recommendations from your DTF film and powder manufacturers, as formulations vary. If you’re transferring onto hats, you may need lower pressure and longer dwell times due to the curved surface; a hat press or curved-cap platen helps maintain even contact. Fine-tune based on test runs to minimize edge blurring and maximize color stability.
Applying DTF Transfers to Different Substrates: Shirts, Hoodies, Hats
DTF transfers yield vibrant results on T-shirts and hoodies, with the white underbase acting as a canvas for bold colors on dark fabrics. Pre-pressing removes moisture and flattens wrinkles to ensure the image seats evenly, while careful alignment helps prevent skewing on sleeves or front panels. This versatility makes it feasible to expand your line of products, including casual wear and promo items.
Applying to hats requires a curved-cap press or a dedicated cap platen to maintain crown shape and prevent warping. Align the artwork, apply protective sheets, and consider a slightly longer dwell time for curved surfaces to achieve crisp edges. With proper backing and pressing technique, you can achieve consistent, professional results across hats, bags, and other textured fabrics as part of your DTF transfer on hats strategy.
Troubleshooting, Care, and Longevity of DIY UV DTF Transfers
Common issues include white halos around edges, color fading after washing, and partial peeling. Halos are often caused by powder buildup or incomplete curing, so ensure even powder coverage and proper cure times before pressing. Fading colors can result from inconsistent heat or pressure, underscoring the importance of validating your heat press settings for DTF across different fabrics.
Care and longevity hinge on proper post-press handling. Wash garments inside out on a gentle cycle with mild detergent, and avoid high-heat tumble drying. Allow items to cure for 24 hours before washing, and store finished pieces away from direct sunlight to preserve color and flexibility. Regularly clean your heat press and workstation to prevent powder contamination on future transfers, ensuring durable results that stand up to repeated wear.
Frequently Asked Questions
What is DIY UV DTF Transfer and why is it a good choice for DTF transfer on shirts?
DIY UV DTF Transfer is a film-based method that moves vibrant full-color designs onto fabrics using a printable transfer film, an adhesive powder, and heat. It offers a soft hand, good wash durability, and strong color reproduction on dark fabrics, making it a flexible option for DIY projects and small runs. When applied correctly, it can be used on shirts, hoodies, and hats with professional-looking results.
What materials do I need for DIY UV DTF Transfer, including DTF film and powder supplies?
For DIY UV DTF Transfer you need a DTF printer or compatible setup, DTF film and powder supplies, and a heat source for curing. You will also want a heat press with temperature control, protective sheets, and suitable garments like cotton and cotton blends. Include design software, cutting tools, and a curved cap press if you plan to do hats.
What heat press settings for DTF should I start with when doing a DIY UV DTF Transfer?
Heat press settings for DTF depend on your film and fabric, but start with about 160 to 170 C (320 to 338 F) for 15 to 20 seconds on medium pressure. Use a warm or cold peel as recommended by your film supplier, and adjust dwell time for hats with a curved-cap platen. Always follow the manufacturers guidelines for your specific DTF film and powder.
How should I design and prepare artwork for DIY UV DTF Transfer to ensure great results on hats and shirts?
Designing for DIY UV DTF Transfer benefits from high resolution artwork (300 dpi), bold colors, and proper color separation for white underbase on dark fabrics. Use vector assets for scalable logos and ensure the print area fits the garment. For hats and shirts, plan the placement carefully and consider curved surfaces and alignment.
What are common issues and how can I troubleshoot DIY UV DTF Transfer, such as white halos or peeling?
Common issues include white halos from powder or incomplete curing, color fading after washing, and peeling due to under curing or insufficient pressure. Troubleshoot by ensuring proper curing, adjusting pressure, and validating peel method. Revisit powder quality and re-test on a scrap piece before final production.
What finishing and care steps help extend the life of a DIY UV DTF Transfer on garments like shirts, hoodies, and hats?
To extend the life of a DIY UV DTF Transfer, allow extra curing time and wash garments inside out on a gentle cycle. Air dry when possible and avoid high heat in tumble dryers. Store finished items away from direct sunlight and keep your heat press clean to prevent powder transfer to future projects.
| Section | Key Points |
|---|---|
| What is DIY UV DTF Transfer |
|
| Materials and Tools |
|
| Design Tips |
|
| Step-by-Step Process |
|
| Heat Press Settings |
|
| Projects |
|
| Troubleshooting |
|
| Care, Maintenance, Longevity |
|
| Sustainability and Quality |
|
Summary
DIY UV DTF Transfer offers a flexible and accessible path to creating personalized apparel with vibrant graphics. This descriptive conclusion highlights how design planning, material choice, precise heat-press settings, and careful finishing can yield durable, soft-hand prints on shirts, hoodies, hats, and more. Whether you’re a hobbyist or a small business crafter, mastering this method expands creative possibilities while delivering professional results that withstand repeated washing. By following the steps and tips outlined here, you can turn plain garments into conversation-worthy pieces with lasting color and feel.